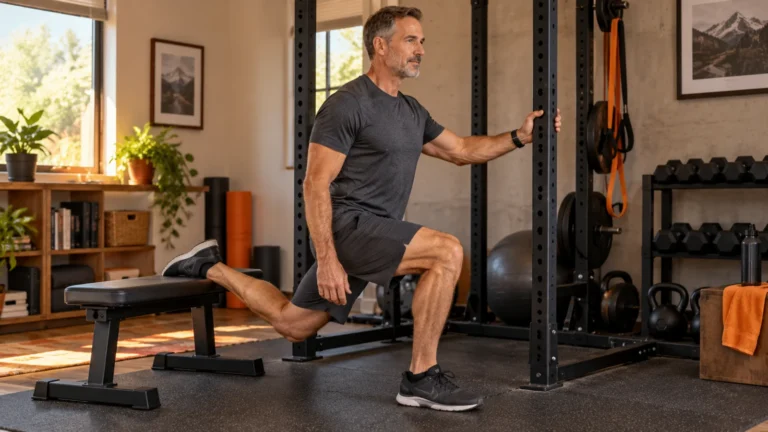
Set up Bulgarian split squats with stable support, comfortable range and clear rest. Choose a regression and log stance, reps and load.
- Learn the floor split squat first.
- Choose a secure comfortable rear support.
- Keep support and stance consistent when loading.
Bottom line Rehearse three unloaded reps on each side, record the setup and keep the version you can control.
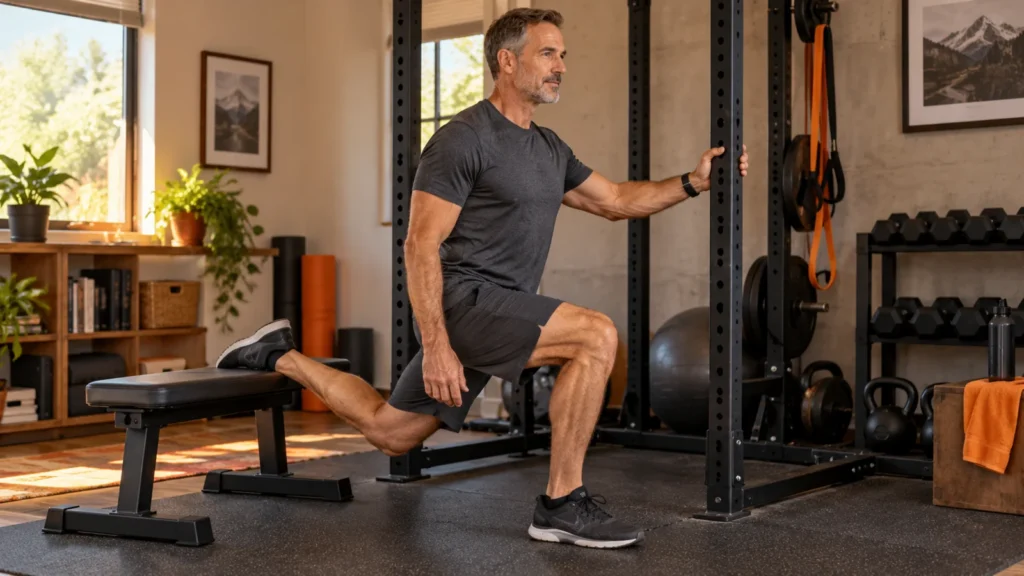
Bulgarian split squats are rear-foot-elevated split squats: the front foot stays on the floor while the rear foot rests on a stable support. They can make leg training challenging with modest external load, but balance and the rear-foot position can become the limiting factors. Start with a supported floor split squat if those factors get in the way.
This guide covers a repeatable setup, controlled repetitions, practical regressions and where to place the exercise in a leg session. The templates are for generally healthy adults; they do not diagnose knee, hip or back pain.
Quick Summary: Bulgarian Split Squats
- Use stable hand support while learning. Keep the front foot planted and choose a rear support that feels comfortable.
- Find your stance through a few unloaded repetitions. There is no universal foot distance or bench height.
- Start with 1-2 sets of 6-8 repetitions per leg. Work toward 2-3 sets of 8-12 only as control and recovery allow.
- Rest between sides if needed, then 90-120 seconds after both sides. Add a small load only after the same setup is repeatable.
Prime Perspective
Hand support can let you practice the leg movement without making every rep a balance test. Keep the support consistent in your training log. Removing it is a separate progression, and it may not be the progression your leg training needs.
What the exercise trains and what the evidence can establish
The front leg’s quadriceps and gluteal muscles contribute to standing up, while the trunk and hip muscles help control position. The rear leg still contacts a support. Calling this “single-leg” training is useful shorthand, but it is not proof that the front leg carries a fixed percentage of every person’s load.
NASM’s demonstration shows the basic rear-foot-elevated movement. A 2021 biomechanical study by Mackey and Riemann compared Bulgarian split squats with back squats in 20 trained men. That study does not establish a universal rear-leg contribution or prove that every torso-angle change isolates one muscle. Load, stance, range and the individual all matter.
For the broader role of one-sided exercises, see our unilateral training guide. Here, the task is to set up and repeat this particular exercise.
Choose a rear support that fits you
A standard bench may be too high or awkward for your rear hip or ankle. You can train a floor split squat without elevating the foot. Use a low, stable purpose-built support only if it stays secure and the position is comfortable; do not pile cushions or loose objects to create height.
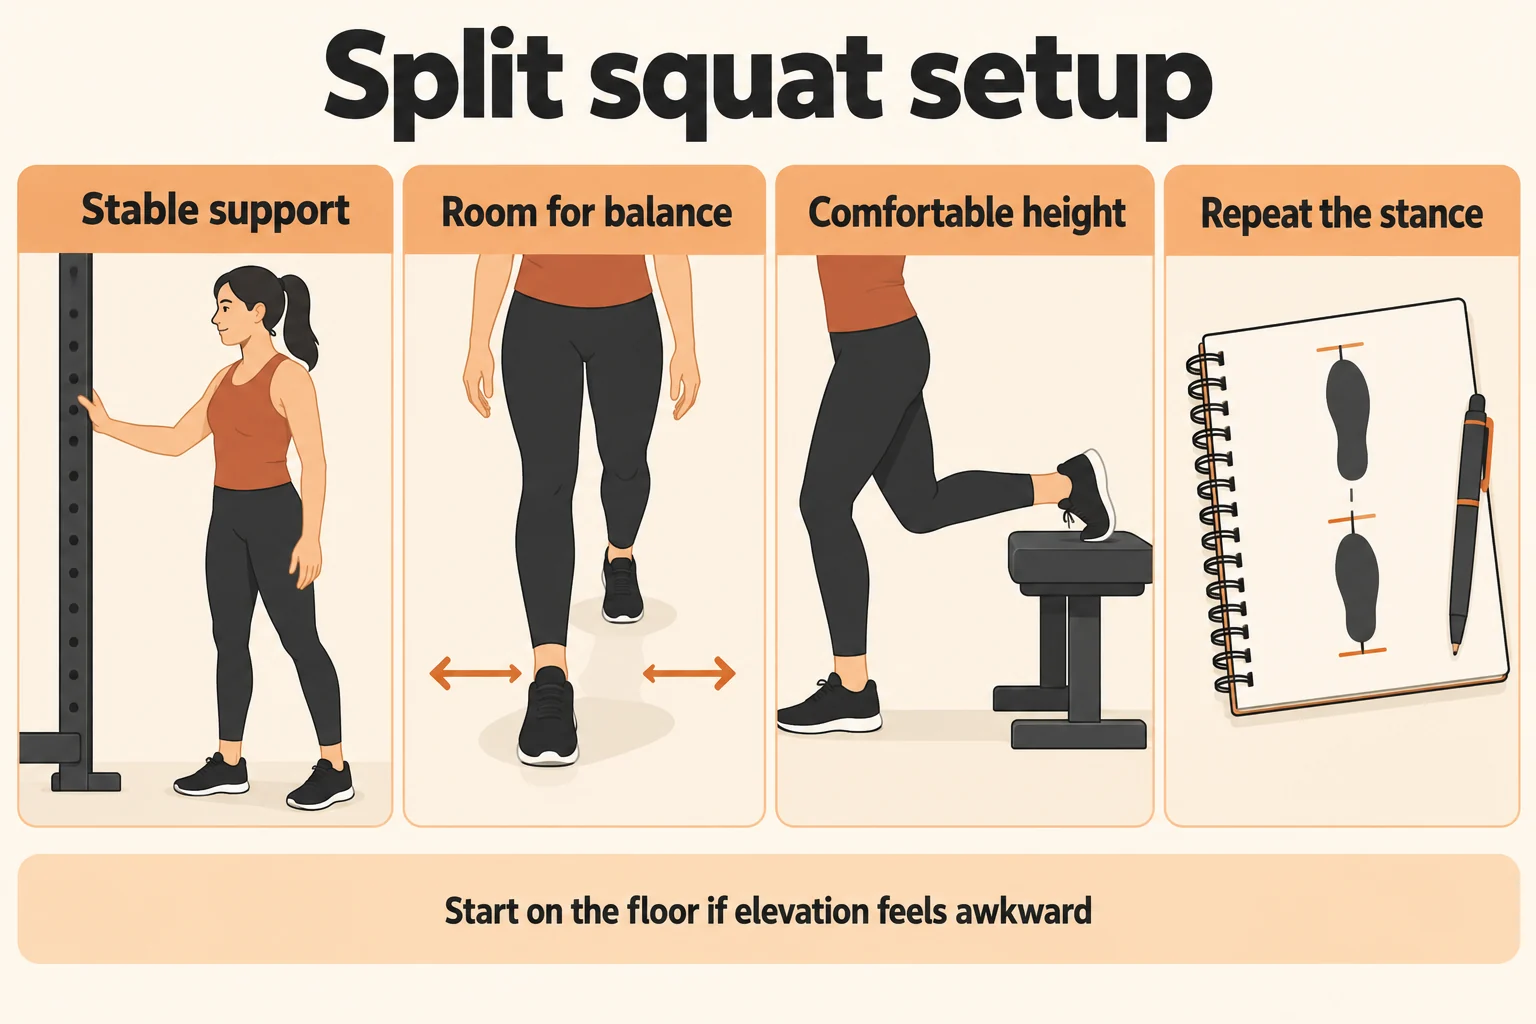
Set up the first repetition
- Check the area. Use a dry, nonslip floor, a support that cannot slide or tip, and a fixed surface for your hand. Keep enough room to place both feet back on the floor.
- Start on the floor. Take a staggered stance with some side-to-side width rather than standing on a tightrope. Hold the fixed support lightly and bend both knees through a comfortable range.
- Elevate only if ready. Place the rear foot on the support in a comfortable position. Do not force the ankle or pull the hip into an uncomfortable stretch.
- Test the distance. Make three slow unloaded reps. Adjust the front foot if you feel trapped, the heel lifts, or you cannot return without pushing or twisting. There is no required number of inches.
- Record the setup. Note the support height, front-foot position, hand support and depth. A small floor marker can help repeat the stance; it is not a prescribed measurement.
Lower, pause briefly, then stand
Keep the front foot in contact with the floor as the front knee and hip bend. Let the knee move in line with the foot rather than forcing it outward or pinning it behind the toes. Lower smoothly into the range you can control, then stand through the front leg without bouncing out of the bottom.
A comfortable small forward inclination of the trunk may be natural. Keep it consistent and avoid collapsing or twisting as fatigue builds. You do not need to reach a fixed thigh angle, touch the rear knee to the floor or copy someone else’s stance. Breathe through the movement; stop the set when you cannot maintain your chosen positions.
Use the video below to see the elevated version, then choose the regression you can control. Our home strength guide explains how to progress repetitions and load without changing every variable.
Fix the setup before adding weight
| What happens | First adjustment | When to stop the trial |
|---|---|---|
| Balance ends the set | Use fixed hand support and a little more stance width; return the rear foot to the floor if needed. | You still cannot control the descent or return. |
| Rear hip or ankle feels forced | Try a lower secure support or a floor split squat. | The position remains painful or increasingly uncomfortable. |
| Front heel lifts | Shorten the range and retest the stance unloaded. | You cannot keep a stable foot without pain or compensation. |
| Knee or trunk shifts abruptly | Reduce load, use support, and slow the descent. | The movement remains uncontrolled; get a technique assessment. |
| One side is much harder | Start with that side and match comfortable repetitions on the other. | Pain, a sudden change or persistent difficulty needs assessment. |
Adjustments are technique trials, not treatments. Pain does not tell you which tissue is involved, and a table cannot clear an injury. Sharp pain, swelling, joint giving-way or symptoms that persist deserve professional assessment. Do not load through them.
Choose a variation for your current task
Supported floor split squat
Both feet remain on the floor. Hold a stable support and use a modest range. Choose this when elevation, balance or setup makes the elevated version awkward.
Supported elevated split squat
Keep hand support while the rear foot rests on a secure comfortable-height surface. Use bodyweight first. This separates the leg challenge from some of the balance demand.
Loaded split squat
Try a suitable dumbbell only after repeatable bodyweight work. One weight can be held in the free hand while the other hand stays supported. An offset load changes trunk demand; log which hand holds it.
A goblet hold or two dumbbells may suit experienced lifters who do not need hand support. Neither is mandatory. A lower-body home workout can use a supported floor split squat in the same single-leg slot.
See two valid setup routes
Both routes keep stable hand support. The floor version remains valid; rear-foot elevation is an option only when secure and comfortable. Loading comes after repeatable control.
Silent, 8.5 seconds. Open the animation directly. Playback pauses offscreen; reduced-motion preferences keep playback manual. Essential instructions are in the article text.
Sets, rest and where it fits in leg day
| Stage | Work per leg | Rest | Next decision |
|---|---|---|---|
| Learning the setup | 1-2 × 6-8, bodyweight and support | 30-60 sec between sides if needed; 90-120 sec after both | Repeat the same stance and comfortable range. |
| Repeatable strength work | 2 × 8-12 with about 2-3 good reps available | 90-120 sec after both sides; take more if breathing or balance has not recovered | Add reps before a small load increase. |
| Additional volume | Up to 3 × 8-12 if the whole week allows | As above | Review recovery and total leg work first. |
One set per leg means a left set and a right set. It does not mean doubling a listed three-set prescription to six per leg. Start with the side that is harder to control and match clean repetitions on the other side. Do not force equal depth through pain.
For a simple session, warm up for about five minutes, practice the split squat unloaded, complete its work sets, then use a hinge or bridge and a calf raise. Put split squats before a fatiguing circuit while learning. If a demanding squat is already the main lift, use fewer split-squat sets as accessory work. Allow at least a day before another demanding leg session and adjust around sport, walking and soreness.
To progress, keep the support and depth constant. Once you reach the upper rep range on both sides with control over two sessions, add the smallest available load and reduce reps toward the lower end. If the new load makes balance or range fail, go back. You can train the legs effectively without removing hand support.
Choose your starting session and keep a log
This helper adapts the article’s starting template to your choices. It does not assess health, prescribe a training load or guarantee that an exercise is suitable.
Use a supported floor split squat for 1-2 sets of 6-8 per leg. Rest between sides if needed and 90-120 seconds after both. Stop for pain or loss of control.
The tables and downloadable log work without JavaScript.
Watch NASM demonstrate the elevated split squat
The demonstration shows the rear-foot-elevated version. Its bench and stance are not universal measurements; use the floor regression when elevation feels awkward.
Watch this demonstration on YouTube if the embed does not play.
Keep a session log away from the screen
Download the one-page split squat setup and session log (fillable PDF). Its eight editable fields record setup, actual work, rest or effort, and the next decision. It also works for handwritten notes. The helper’s print button creates a separate record with your current selections, notes and checkmarks.
Equipment options for the exercises you use
Keep suitable equipment you already own. These options serve different needs; you do not need the whole list to follow the starting plan. Check the exact model, selected size, package, seller and current manual before ordering.
As an Amazon Associate, PrimeForMen earns from qualifying purchases. Prices and offers can change.
Best for: For a suitable one-weight split squat while the other hand remains supported. Skip it if its minimum load or adjustment steps are too large. Current Amazon listing: Amazon Basics Adjustable Dumbbell with 5 Weight Options, 25 lb, Single Dumbbell, Black Best for: For a rear-foot support only if the exact bench is stable and its height is comfortable. Skip it when a supported floor split squat suits you or the bench feels too high. Current Amazon listing: YOLEO Adjustable Weight Bench, ASTM-Certified 827LBS, 98% Pre-Assembled * As an Amazon Associate, PrimeForMen earns from qualifying purchases.Recommended Products
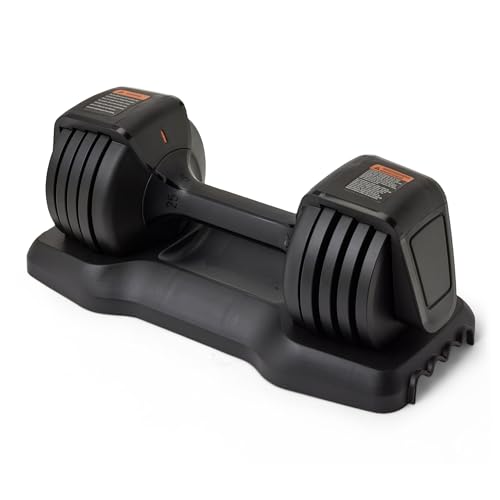
Amazon Basics adjustable single dumbbell
View on Amazon

YOLEO adjustable weight bench
View on Amazon
Frequently asked questions
How high should the rear support be?
High enough to place the foot comfortably and low enough to avoid forcing the rear hip or ankle. There is no universal height. A floor split squat is a valid alternative when no secure comfortable support is available.
Can the front knee move beyond the toes?
It can during a controlled squat. Do not enforce a universal toes-behind-knee rule. Keep the foot stable, use a comfortable range and stop if pain or loss of control develops.
Is this only a glute exercise?
No. Quadriceps, gluteal muscles and stabilizers contribute. Stance and trunk position may change demands, but they do not switch one muscle completely on or off.
Is holding support cheating?
No. Support changes the balance task. It can help you repeat the leg movement; record its use so your sessions remain comparable.
Should I do it every day?
Hard daily sets are not the starting plan here. Use one or two leg sessions with recovery between them, and count other demanding leg exercise toward your total work.
Make the next set repeatable
Choose a secure setup, rehearse both sides and record the version you used. The full-body home workout guide helps place it alongside upper-body work. See our editorial policy for evidence and recommendation standards.
Exercise and affiliate notes
This is general education for adults, not diagnosis, rehabilitation or an individually assessed program. Stop for pain, dizziness, faintness or unusual breathlessness. Seek urgent help for severe symptoms, including chest pain. If you have a medical condition, recent surgery or an exercise restriction, get appropriate guidance before changing your routine.
Equipment recommendations are based on documented listings and fit, not hands-on testing. Generated editorial imagery and diagrams are illustrative and do not establish technique, product performance or results.
As an Amazon Associate, PrimeForMen earns from qualifying purchases.