Use resistance band training with full-body sessions, secure setup checks and repeatable progression. Compare loops and tubes and download a training log.
- Match the band shape to the exercise and attachment.
- Record band, anchor, stance and starting stretch.
- A new color is not a standardized load increase.
Bottom line Choose the session your band and approved setup support, then record the same starting conditions before comparing repetitions.
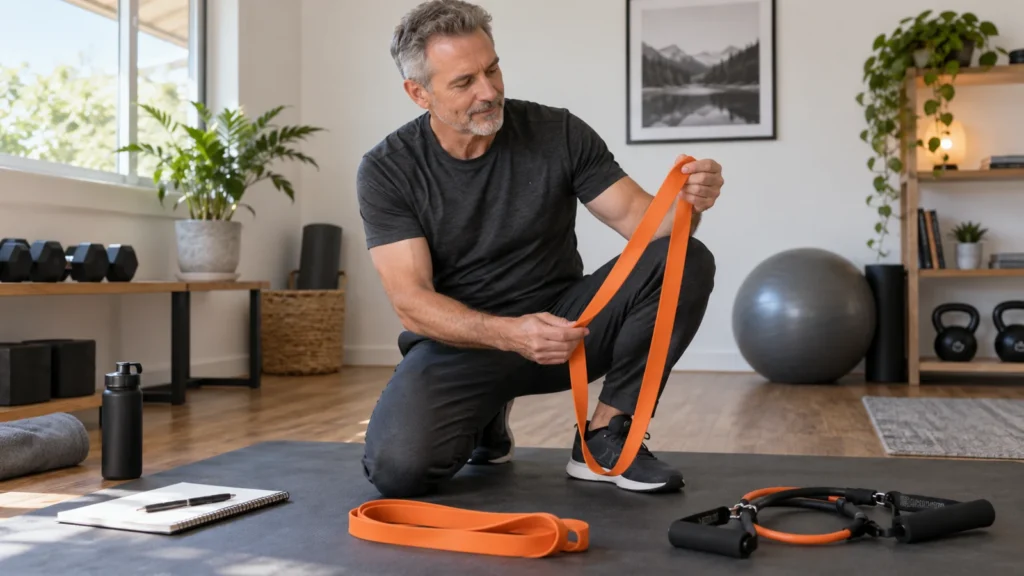
Resistance band training works best when the exercise, attachment and starting stretch are repeatable. Choose a long loop or handle-tube system that supports your planned movements, then record the setup before comparing repetitions. A band’s color or printed resistance range is not a fixed dumbbell-equivalent load.
Quick Summary: Resistance Band Training
- Match the band shape to the exercise and attachment.
- Record band, anchor, stance and starting stretch.
- A new color is not a standardized load increase.
The Prime Perspective
Bands offer portable resistance for useful strength exercises. Their flexibility also creates a measurement problem: a small step away from the anchor can change the task while the band itself stays the same. Record the exercise name, band identity and starting position together.
The 2019 review comparing elastic and conventional resistance found similar strength gains across its included comparisons. That supports bands as a training option; it does not prove every band exercise, population or home setup is equivalent to every free-weight program. The exact A/B sessions here are editorial examples, not a study protocol.
Long loops, handle tubes and mini loops are different tools
A long loop can support foot-anchored hinges, squats and rows when the maker permits the setup. Handle tubes can provide comfortable grips and different attachment options. A short fabric mini loop mainly changes lower-body or small-range tasks; it is not a direct substitute for a long band in a chest press.
Compare usable length, handles, clips and approved attachments before the headline resistance number. Inspect for cracks, tears, fraying and damaged connectors before use. Replace damaged equipment rather than tying a repair into the stretched section. Some bands contain latex; check the material if that matters to you.
| Band type | Useful tasks | Limitation to record |
|---|---|---|
| Long closed loop | Foot-anchored squats, hinges and approved rows | Grip length, stance and starting stretch change resistance. |
| Handle-tube system | Approved anchored rows and presses; foot-anchored curls | Clips, handles and anchor must be compatible with the exact system. |
| Short mini loop | Selected hip and leg accessory movements | Not a complete replacement for a long-loop or tube program. |
| Door or wall attachment | An approved line of pull when the structure is suitable | A purchased anchor does not verify your door, wall or installation. |
Optional equipment for this setup
Use the equipment you already have when it meets the plan. We have not hands-on tested these models. The current catalog and product images were checked on October 7, 2026; specifications and variants can change.
As an Amazon Associate, PrimeForMen earns from qualifying purchases. The links below are affiliate links. Check the selected variant and current instructions before buying.

Long-loop resistance band set
Long loops for compatible foot-anchored or approved attached movements.
- Check the current variant, usable length and material.
- Follow the maker’s permitted grip, stretch and anchoring instructions.
- Identify each band in the log; colors are not a universal resistance scale.
Skip it: Skip this set if the length, material or approved setups do not match your exercises.

HPYGN handle-tube system
Handles and tubes for compatible rows, presses and curls.
- Verify the current tubes, handles and included attachments.
- A headline combined resistance is not a constant load through a repetition.
- Record the exact connected tubes and repeat the starting position.
Skip it: Keep your existing system when it supports the plan; do not mix incompatible clips or anchors.
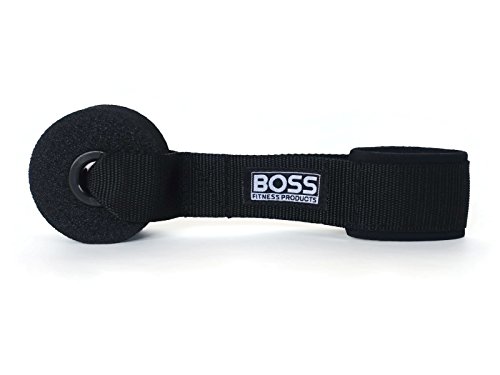
BOSS Fitness door anchor
An attachment to consider only for a compatible band system and suitable door.
- Read the exact placement and door-closing instructions.
- Prevent anyone opening the door during the set.
- Buying the anchor does not verify the structure or your installation.
Skip it: Do not use a door attachment while the door condition, instructions or compatibility remain unresolved.

Ultimate Workout Journal
A paper record for loads, repetitions and the setup that produced them.
- Record the exact movement and load unit rather than a vague workout score.
- Keep left and right results separate when the movement is unilateral.
- Use a new page to compare repeated conditions and planned changes.
Skip it: An ordinary notebook or the free worksheet below does the same recording job.
Inspect the anchor and the line of pull
Use only an attachment and installation the equipment manufacturer permits. A door handle, loose furniture leg or improvised knot is not a substitute for a rated exercise attachment. For a door anchor, follow the exact instructions for door condition, closing direction, hinge-side placement and locking; prevent anyone opening the door during the set.
Start unloaded, inspect the connection and use gentle tension before taking the exercise position. Keep your face out of the recoil path and release tension under control. Do not test an unknown setup by pulling it as hard as you can. If the attachment or structure is uncertain, leave anchored work out until it is checked.
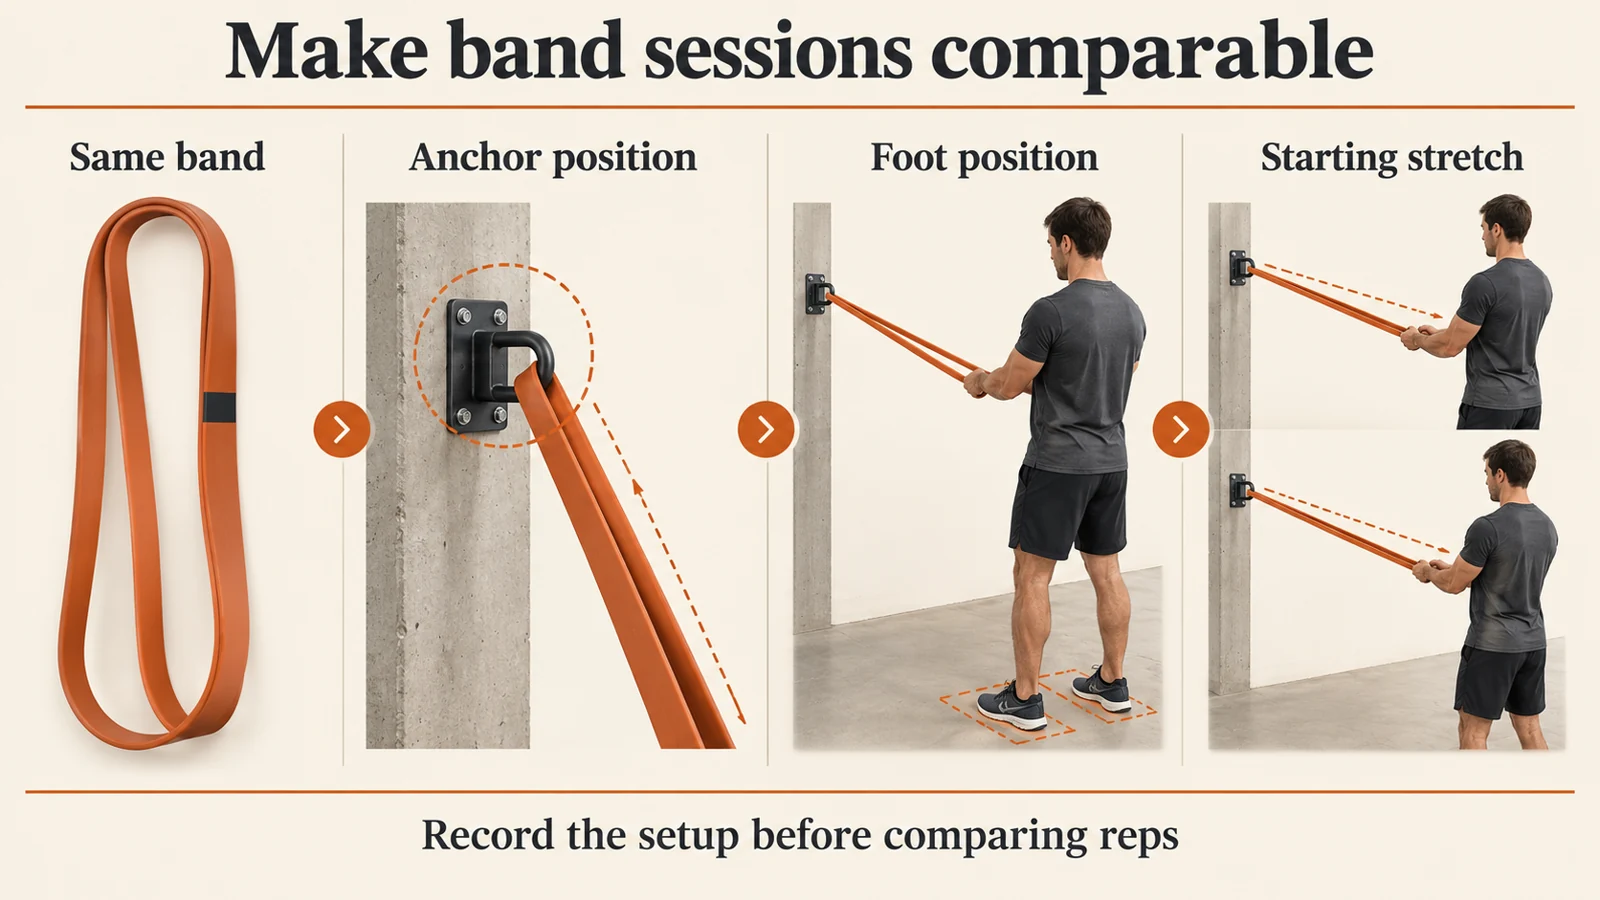
A wall attachment has separate structural and installation requirements. The infographic shows the setup variables, not a construction plan. Our wall-mounted gym guide explains why a product’s load claim cannot establish whether your own wall and fixings are suitable.
Record four setup variables
Write down the exact band or tube combination, anchor position, foot position and starting stretch. Add grip length and the intended range when they affect the exercise. A floor mark can help you return to the same stance, provided it does not create a trip or slip hazard.
Tension generally rises as a band stretches, but the curve depends on the material and length. The load at the start and finish can differ. Do not label the whole repetition as a measured number of pounds just because the packaging provides a range. Combining tubes also needs a connection designed for that combination.
Make band sessions comparable
A training log reveals four details to record: band, anchor, stance and starting stretch.
Silent 8.5-second schematic. Motion pauses outside the viewport. Reduced-motion settings keep manual playback. Open the MP4 directly.
| Record | Example entry | Why it helps |
|---|---|---|
| Band | Brand/model, identified loop; or exact connected tubes | Colors are not standardized between brands. |
| Anchor | Approved middle attachment at the same marked height | Changing height changes the line of pull. |
| Stance | Same foot positions relative to the attachment | Distance changes the starting stretch. |
| Range and grip | Same handle or grip point; same controlled start and finish | A shorter grip or range makes the comparison different. |
Two full-body resistance band workouts
These editorial examples are for adults who already know the chosen movements and have compatible approved equipment. Rehearse for about five minutes with easy movement, unloaded squats and hinges, then light practice repetitions. The table lists work sets rather than warm-up sets.
Start with one set per movement when returning after a break. The full example uses two. Leave about two or three controlled repetitions available and rest 60–120 seconds between work sets, taking longer if breathing, attachments or side changes need it. Allow roughly 30–45 minutes with the setup prepared.
| Session | Movement and work | Setup condition |
|---|---|---|
| A | Band squat 2 × 8–15; row 2 × 8–15; chest press 2 × 8–15; Pallof press 2 × 6–10 each side | Squat uses an approved foot setup; row, press and Pallof need the appropriate approved line of pull. |
| B | Band hinge 2 × 8–15; supported split squat 2 × 6–10 each side; curl 2 × 10–15; comfortable overhead press 2 × 8–12 | Use approved foot anchoring for hinge/curl/press. The split squat can remain bodyweight when holding a band conflicts with support. |
| Optional C | Repeat A or B after recovery | Use the same setup. A third day is optional; do not increase frequency and resistance at the same time by default. |
Two nonconsecutive sessions, such as Monday and Thursday, provide a simple starting arrangement. If you already use the home strength plan, replace comparable sessions rather than adding these two on top. The lower-body guide explains supported split squats and hinge cues in more detail.
What changes when there is no approved anchor?
For a compatible long loop or tube, a familiar foot-anchored bent-over row may replace the anchored row. The torso now holds a hinge, so it is not the same version. A chest press can use a manufacturer-approved band-behind-back setup only when the band length, grip and instructions allow it; otherwise use a comfortable wall push-up.
Replace the Pallof press with a familiar wall plank or another already learned trunk exercise from the core stability guide. Record that as an equipment-free substitution, not an equivalent amount of band resistance. If you cannot establish a comfortable hinge for a foot-anchored row, do not invent an anchor to keep the table intact.
The helper below makes missing setup information visible. A choice in a menu cannot confirm attachment safety, personal suitability or a correct technique. Use the printed record to identify what still needs checking.
Use these cues before increasing resistance
For a squat or hinge, keep the band from slipping and use a grip approved for the band type. A hinge moves the hips back with soft knees and a steady trunk. Stop before the position changes; reaching the floor is not required.
For an anchored row, establish the foot and anchor positions before pulling toward the torso. Return with control and avoid leaning backward to create extra movement. For a chest press, check that you can start and finish without the tube scraping an unsuitable surface or pulling you off balance.
For curls and overhead presses, verify the foot contact, grip and full movement path under light tension first. The overhead press remains optional when the movement is unfamiliar or uncomfortable. Never stretch a band farther than its instructions permit to force the prescribed repetition range.
Pallof presses and split squats: keep the setup simple
For a familiar Pallof press, stand side-on to the approved attachment and hold the compatible handle or band in both hands near your chest. Establish light tension and firm footing before pressing the hands forward. Keep your torso facing ahead as you extend and return. The task is to resist turning toward the attachment, not to rotate the trunk through a large arc.
Move far enough forward only while you can maintain a comfortable controlled position. Complete the selected repetitions, release tension under control and change sides while unloaded. Record attachment height, distance and the same reach. If you have never learned the exercise or cannot establish the attachment, use the familiar equipment-free substitution instead.
For a supported split squat, begin with a stable staggered stance and a suitable fixed hand support. Lower within a comfortable range and rise without pulling yourself up through the support. Keep the rear foot on the floor for this starting version. Rehearse with bodyweight before introducing an approved band setup; if holding the band removes needed support, keep the movement bodyweight.
Count the split squat and Pallof work on each side. Two sets of eight per side means 16 repetitions on the left and 16 on the right for that movement. Reset the setup between sides and rest longer when needed. These cues help someone who knows the exercises repeat them; they do not replace instruction for an unfamiliar movement.
Progress one variable while preserving the record
Suppose an anchored row is logged as 12 and 11 repetitions with the same band, anchor, stance and grip. Repeat that setup and work toward 15/15 over comfortable exposures. Only then consider one manageable change that the equipment permits, such as another band level.
Moving farther from the anchor and changing to a stronger band at once obscures what changed. A new band color is not necessarily a small increase, particularly across brands. Return toward the lower end of the range and check technique when the demand changes. Use our progression guide for a wider discussion of load, repetitions and rest.
Keep the existing setup when the next band is too demanding or the current one becomes loose at the start. You may need another band length, a different approved movement or suitable dumbbells. There is no need to force every exercise through the same elastic resistance curve.
Technique demonstration: British Heart Foundation resistance band exercises
Cardiac rehabilitation expert Hara Markos demonstrates band movements with standing and seated options. This is a technique resource, not individualized rehabilitation or the A/B prescription below.
When bands are a poor match for the task
A band that becomes loose through part of the movement or makes the finish much harder can be a poor match for the intended exercise. Changing the anchor changes the task, and it may also create a new safety question. Compare equipment through the band buying guide rather than assuming more advertised pounds solves the problem.
Stop for sharp or increasing pain, numbness, unusual weakness, a slipping anchor or damaged equipment. Persistent or injury-related symptoms need assessment. Bands are not automatically joint safe or a rehabilitation plan simply because they are light and portable. The recovery guide helps review training workload; it cannot diagnose a symptom.
Band setup record
This helper organizes your choices; it cannot assess technique, symptoms, equipment safety or personal suitability. Entries stay in this page’s memory and are not saved or sent. Print the current record before leaving.
Record your selected setup, loads, repetitions, rest and other work in a notebook or the blank PDF below. For unilateral work, three sets of eight on each side means 24 left and 24 right repetitions. Keep unknown attachment or handling details unresolved until checked.
The helper printout includes current choices and notes. The downloadable PDF is a separate blank fillable record and does not import your entries.
Download the fillable training record
The one-page PDF has eight editable fields for your setup, work and next session. It starts blank; it does not receive the helper entries. Save a copy after filling it in a PDF reader, or print it and write by hand.
What a workout table cannot decide
The repetitions describe an example session. They cannot establish whether a movement, load or attachment suits you. Record the unresolved detail, reduce the task when needed and get qualified help for persistent symptoms or an unfamiliar setup.
Your next session
Use this resistance band training guide to choose a repeatable setup and a manageable amount of work. Choose the session your band and approved setup support, then record the same starting conditions before comparing repetitions.
The 2026 ACSM resistance-training overview supports regular work across the major muscle groups and gradual progression. The detailed sessions on this page are editorial examples; they are not ACSM protocols or individually prescribed plans.
Frequently asked questions
Can resistance bands build strength?
Yes. Research supports elastic resistance as a useful strength-training option. The result depends on the program and execution; a band is not equivalent to every free-weight exercise or load.
How do I choose the resistance color?
Use the exact manufacturer and model, then choose a setup you can control. Colors are not standardized between brands, and printed resistance ranges are not constant force through a repetition.
Can a mini loop replace the long-band program?
No. A short mini loop has different length and grip options. Use it for suitable accessory movements rather than treating it as a whole-body substitute for long loops or handle tubes.
Do I need a door anchor?
Only for exercises that require an approved external attachment. Some compatible bands support foot-anchored work. A purchased anchor does not verify your door or installation.
How do I make band progress measurable?
Keep band, attachment, stance, starting stretch, grip and range comparable. Record repetitions and effort, then change one manageable variable when the current setup is consistently controlled.
General fitness education for adults, not a diagnosis, rehabilitation plan or medical clearance. Follow any restrictions from your clinician. Stop for sharp or worsening pain, dizziness, unusual breathlessness or loss of control. Seek urgent care for severe or sudden symptoms.